 Here is a list of Supplies needed:
1 (12x6) SOLID Cardstock for your COVER (Scored at 2.75” & at 3” on ea edge)
3 (12x5.75) Cardstock for the INSIDE FLIP PAGES (Scored at 3” on ea edge)
2 (5.75x5.75) Cardstock for COVER PANELS
1 (12x5) Cardstock for CENTER FOLD OUT PAGE (Scored at 4” & 8”)
2 (5.5x5.5) Patterned Papers to decorate FRONT & BACK COVERS
4 (6x6) Coordinating Patterned Papers used to decorate/embellish pages
Misc Die Cuts, Tags, Flowers, Stickers, etc to embellish
Step 1:
Score COVER 12x6 at 2.75” AND at 3”... and fold both score lines on each side to form a Square shape. (Your edges will NOT meet in the center!)
Step 2:
Score each 12x5.75 FLIP PAGES at 3” on each edge and fold in to form a square and the edges WILL meet on these paegs.
Step 3:
Score the CENTER FOLD OUT PAGE (12x5) at 4” and 8” and fold accordian style.
Step 4:
Adhere FLIP PAGES together by adhering the MIDDLE Flip Page flaps to one of each of the other Inside Flip Page flaps.


Step 5:
Adhere CENTER FOLD OUT PAGE to center Flip Page.

Step 6:
Fold Pages all in to each other so you have a Square. Adhere the flip Pages – gluing the BACK of the CENTER Page to the INSIDE of the opened COVER – center to allow the scored flaps to fold over and cover the Flip Pages.


Step 7:
Adhere (5.75x5.75”) Cardsock squares to outside flaps to form COVER pages.


Step 8:
Adhere 2 (5.5x5.5) Patterned Papers to COVERS.


Step 9:
Use remaining papers and misc embellishements (and Photos of course) to decorate as desired!
Step 10:
SHOW IT OFF! No one will believe how easy it really is!


 I got to have my Link fix... he is just getting so big - and I can't TELL you how much he LOVES playing with rocks!!!

 and lastly... an update on the SUN CITY 5K...
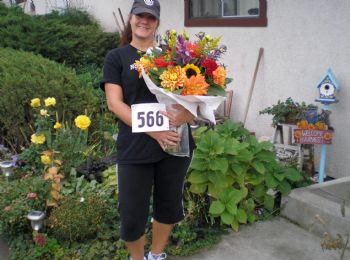
In the end, I crossed the Finish Line with a new Personal Record of 33:12... that is just under 11 min miles... 3 of them in fact! It's also 4 minutes off my time from last week, and over 2 minutes off my time from last year - when I had been training longer and more consistently! I really WANTED to make it in 11 minute miles but didn't tell anyone because it just seemed really ridiculous! I mean - after having to quit running due to an injury in March, and just picking it back up a few weeks ago - I was feeling realistic at hoping to come in under 40 minutes. Once I cooled off and refueled, we walked around through our local Farmers Market and my Honey bought me these GORGEOUS flowers... my little 'bonus' reward...

My main reward: Once again - meeting a Goal - and how!
~Karrilee~


